Export the contact sheet — one file, not frame by frame
When your frames are ready, hit Export and choose Contact sheet. That's your whole retro — title card, ice breaker, every method frame, and the action items frame — compiled into a single high-resolution image, laid out in running order with every question already in place.
"Each frame" exists for special cases (sharing one frame on Slack, printing a single still). For running the retro, the contact sheet is the one you want.
Export
Drag it onto your board
Open Miro or FigJam and drag the downloaded PNG straight onto the canvas. No plugin, no import dialog, works on every plan — it lands as one image. Resize it big: it's your retro's set, not a thumbnail. Lock it in place (right-click → Lock) so nobody drags the scenery around mid-retro.
Tip: lock the image before the session starts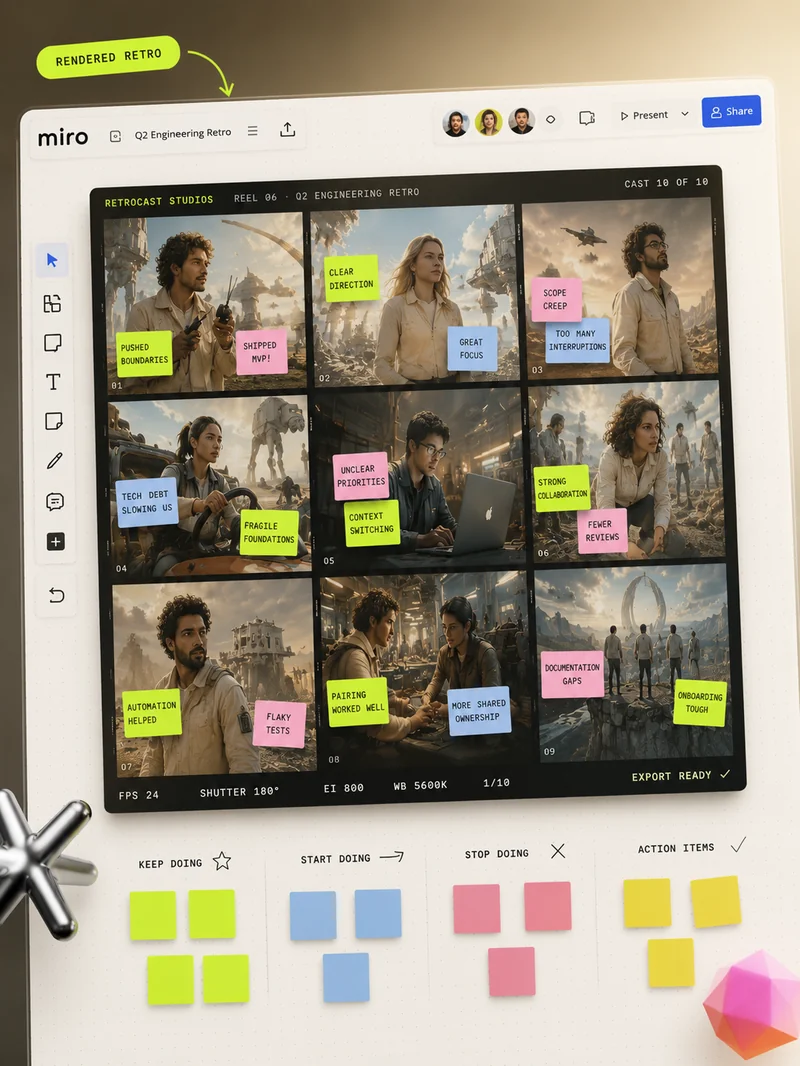
Stickies go ON the frames — that's the whole idea
Each frame is a zone of your board. The team posts their stickies on top of the frame they're answering — on the scene, over the image, right where their teammate is starring. The frame's question strip tells everyone what belongs there, and the action items frame has three labelled zones waiting for who / what / when.
The board fills up like a film poster wall, and the structure stays readable from across the room (or across the call).
 ✓
✗
✓
✗